

How To Set Up Xsplit Broadcaster
1 Introduction
If you desire to showtime streaming and you lot still don't know which program you should apply, i of the easiest softwares to install and start is XSplit Broadcaster. This software stands out for its robustness, ease of use and will allows you lot to stream, within minutes, on nearly every streaming platform. XSplit Broadcaster is just compatible with Windows and it is a peachy selection for alive streaming on Twitch, Facebook and YouTube.
2 How to install XSplit Broadcaster
To employ XSplit Broadcaster the first affair you have to do is download the software from the official website:https://www.xsplit.com
Once inside, click on the blue "Download Broadcaster" button and, within a few seconds, the download will automatically start. If the download doesn't start, yous tin can download it direct fromhere.

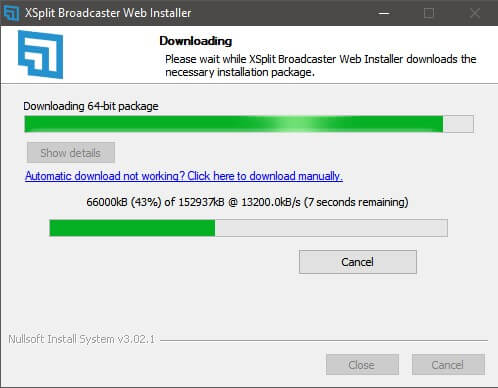
One time in your estimator, double click on the .exe file, that you lot've just downloaded, and kickoff the installation.
Every bit soon equally you open up it, information technology will start downloading. You only accept to wait until it takes you to the classic installation procedure.
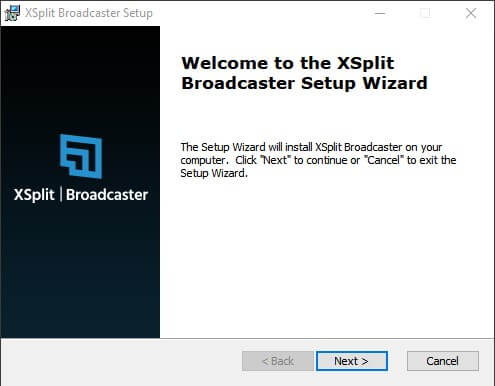
Once you get to this screen, you lot volition kickoff the installation past clicking "Adjacent".
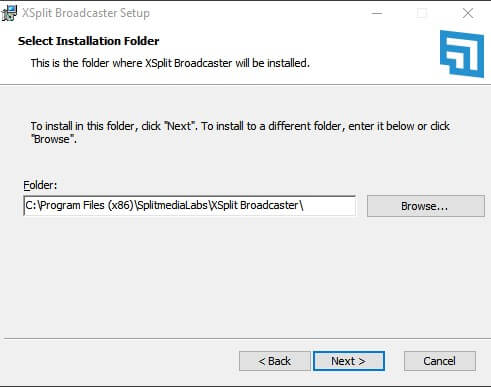
Then you accept to choose the folder where the program should be installed. And then click "Next".
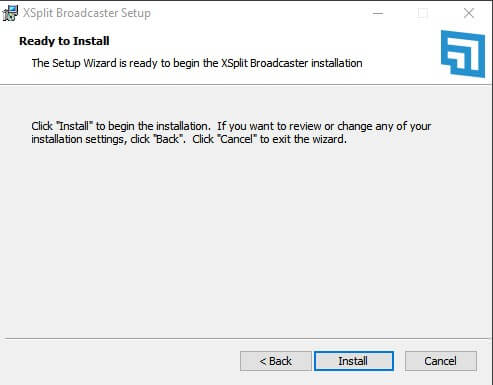
After choosing the installation folder, you can commencement the installation past clicking on the "Install" button.
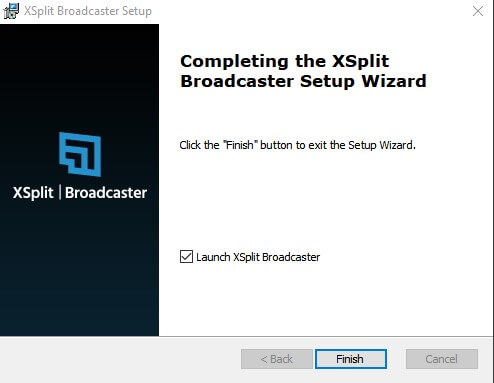
When the installation is finished, you tin close the installation and starting time the program by clicking on "Finish".
What operating systems are compatible with XSplit Broadcaster?
You tin install XSplit Broadcaster on your Windows PC. It is compatible from Windows vii x64 or higher.
MAC OS or Linux are unfortunately non compatible with the streaming software.
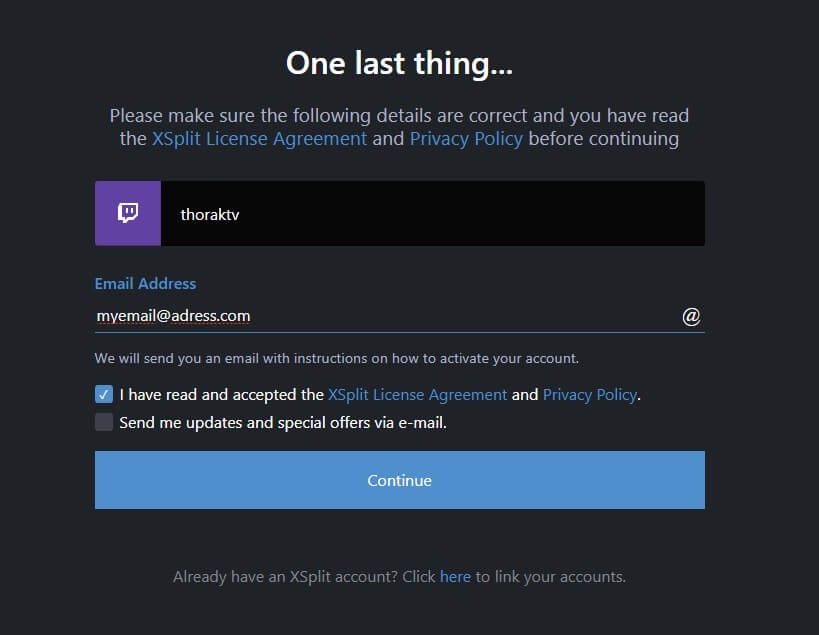
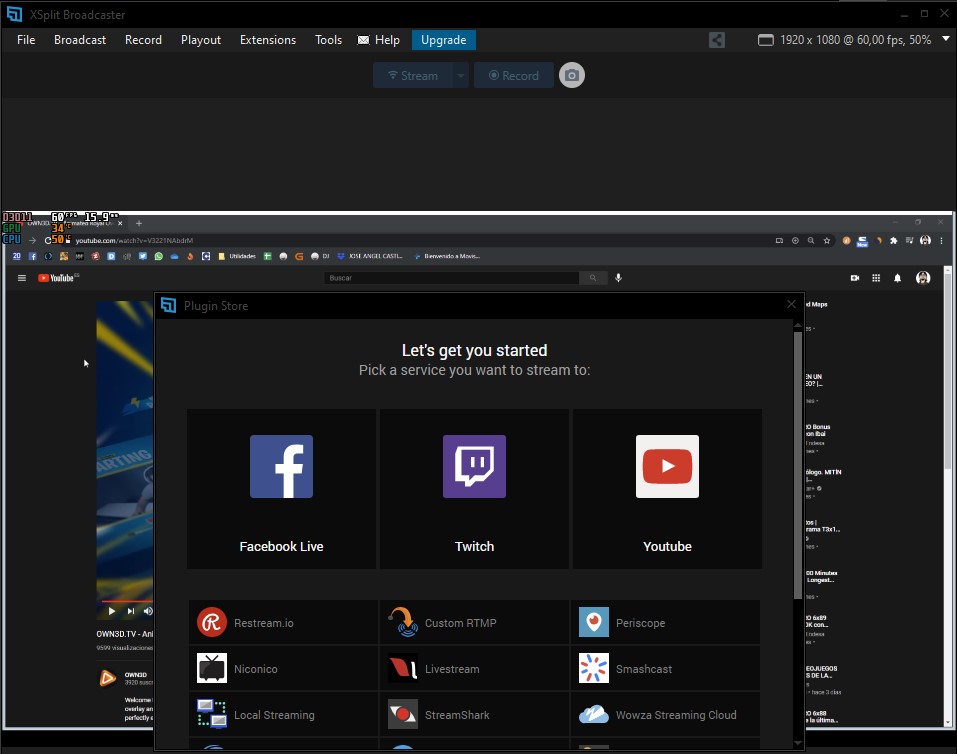
The very kickoff time when you open the software, XSplit Broadcaster invites yous to choose an account which yous want to connect to it. You tin can choose to utilise and create an XSplit business relationship, your Twitch account, Facebook or YouTube, among others.
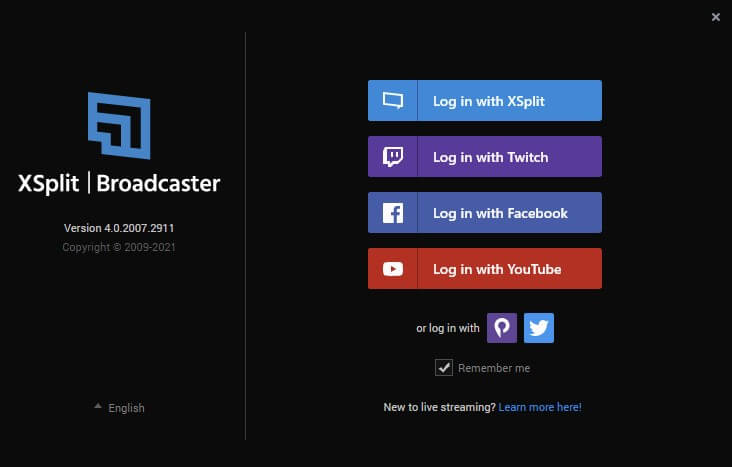
For this guide, we are going to cull Twitch, since it is the streaming platform par excellence and also allows us to apply animated overlays, panels and banners.
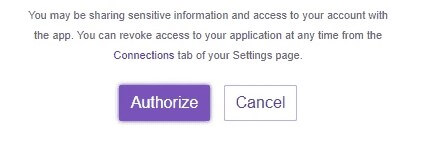
In one case y'all have clicked on the service yous like, in our case Twitch, a new window will open in the browser. Here y'all volition have to "Qualify" XSplit Broadcaster to become data about our channel and interact with it. Just click on the purple "Authorize" push at the bottom of the page.
After giving it access to your Twitch data, XSplit will send you to some other window to accept an understanding by clicking the blue "Keep" button.
Optional:At the lesser of this screen, information technology will permit yous to link your Twitch account, with your XSplit account, by clicking the blue "Hither" button.
When you have the message, XSplit Broadcaster will launch and you lot will see a window where you can cull whether you lot want to upgrade your account for $iv.99 per calendar month or continue with the gratis account.
The Premium version of XSplit allows yous, among other things, to use the Virtual Photographic camera, access to 24/7 Premium back up, unlimited scenes and preview your changes before they get live.

After choosing the manner yous want to apply, y'all will go straight to the Command Panel, or main screen of XSplit Broadcaster. Next, we volition explain in detail the most interesting menus and options to outset your stream.
3 XSplit Broadcaster – Overview
The first time you lot launch XSplit, the application volition ask y'all for what you are going to use it. Depending on your choice you lot will become helpful tips to setup XSplit for your needs. Nosotros are going to choose PC Gaming, as this will assistance us to explain some of the parts of the interface a piffling improve.
On the left, you can also see a link to the user manual and you are invited to picket several tutorials on YouTube.
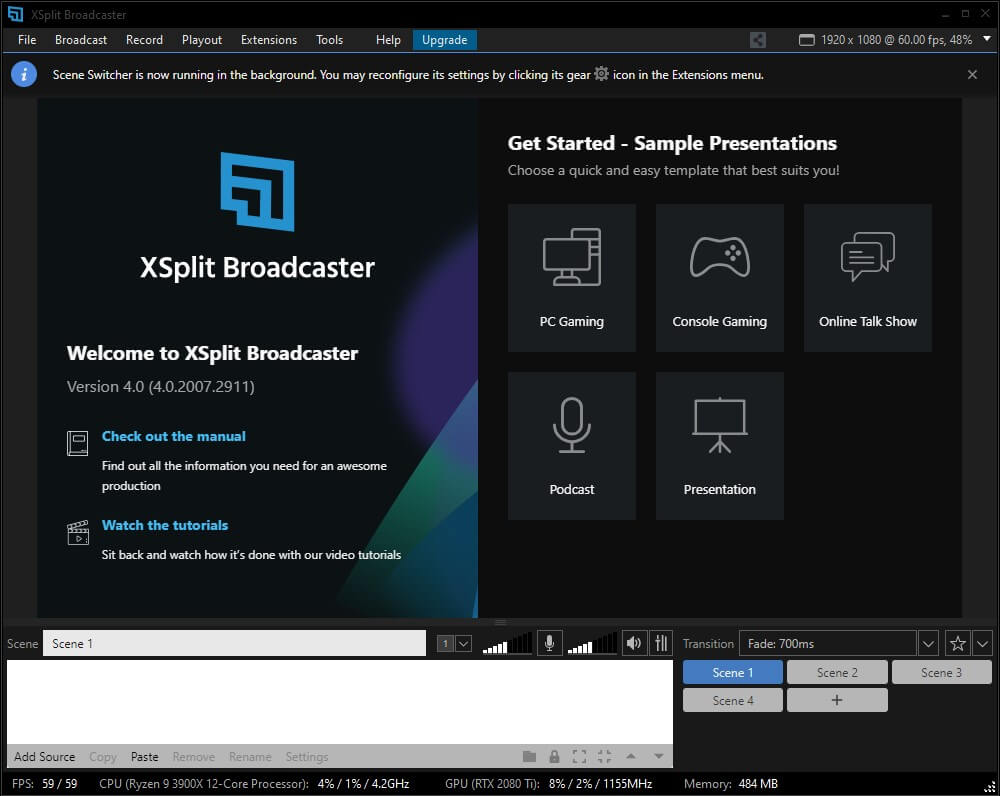
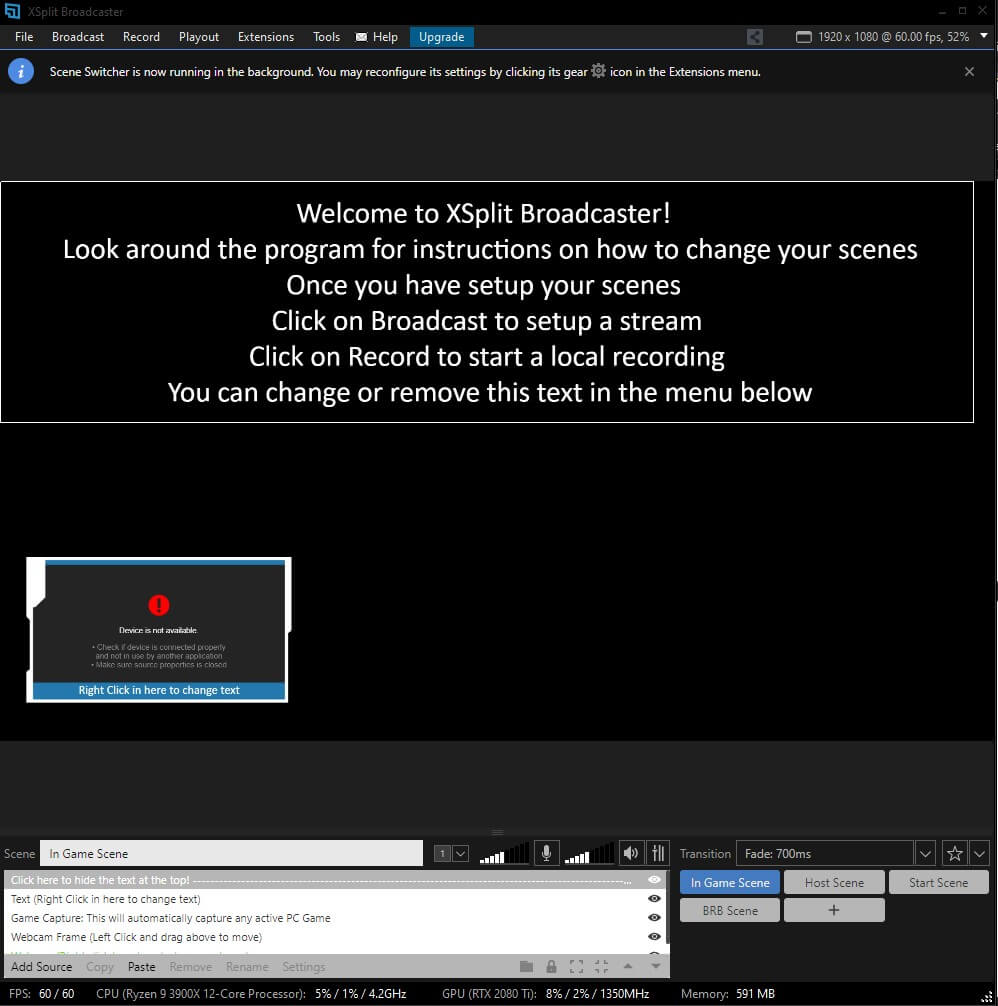
When you cull whatever of the options, XSplit will automatically create several test scenes and add together some elements such as a webcam, a camera overlay, texts and a game capture source.
At the top you can find a few menus which we volition explicate in the follow a little deeper:
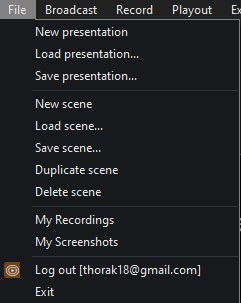
File– In this section y'all can create new scenes, load old ones, duplicate them, admission your recordings and close the program.
Broadcast– Here you lot tin can cull where you lot want to stream, in our case Twitch. When you click on Twitch, you will have to enter your credentials and give it admission to your account.

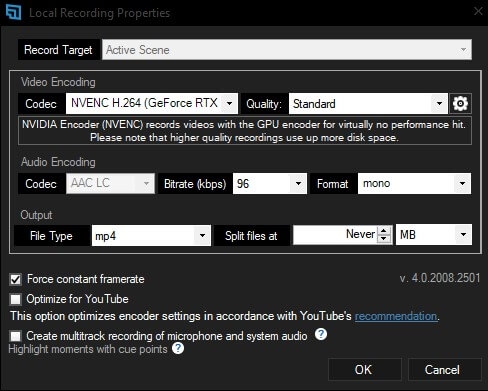
Record– In this card you will be able to configure all the details of the recording, from which scene y'all want to record to which video and audio encoder you want to employ. Yous will also able to make up one's mind the quality together with its quality and the output format.
Playout– With this option you lot can stream your video over the network to another device compatible with NDI technology.
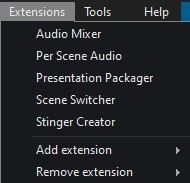
Extensions– Extensions are a fundamental function of XSplit. From here you can configure the audio mixer, separate the audio for each scene, configure presentations, scene changes and create transitions. In add-on, you lot can add together and remove other installed extensions.
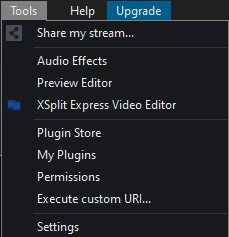
Tools– In the tools menu y'all will discover the program's options, along with the options for sharing the stream, the plugin store, sound furnishings and permissions.
Help– Do you demand any help? This is your place. You lot will find video tutorials, user manual, updates, patch notes; you lot can also change the software linguistic communication from hither, and even chat with the back up.

Upgrade– This blue button allows you lot to upgrade your gratis account to premium for a monthly payment of $4.99.
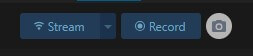
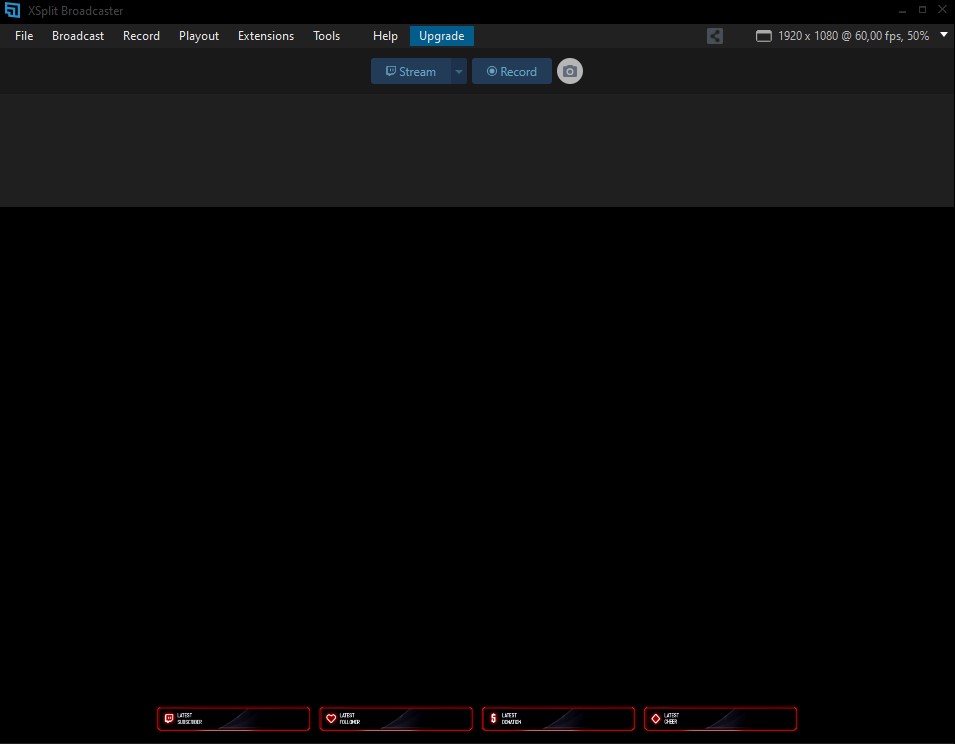
Stream y Record- In addition, at the meridian you will as well find the two virtually important buttons of the program: Stream and Record, and fifty-fifty one for capturing.
On the other hand, in the lower part of the awarding, you observe the scene panels, the controls to activate and deactivate the microphone and speakers, the transitions configurator, and everything you need, to add together sources to your scenes.

4 Basic streaming configuration for XSplit Broadcaster
Next, we will teach you how to configure XSplit Broadcaster to start streaming as soon as possible, with no extras, simply open it, configure the essentials and start streaming.
4.i Configure the resolution and add together sources
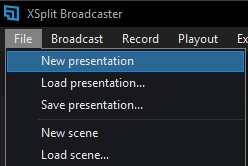
First of all, you are going to create a new scene. To do this, go to "File" at the elevation left, and click on "New presentation".
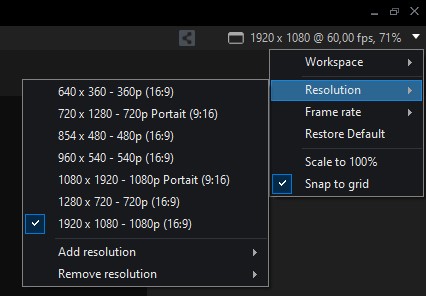
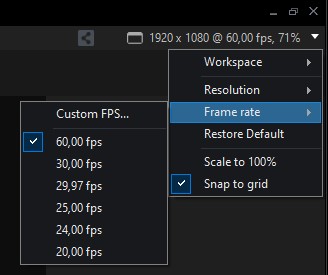
Side by side, you are gonna cull the resolution and the FPS at which y'all are going to stream. Go to the top correct, and click on the pocket-size white arrow.
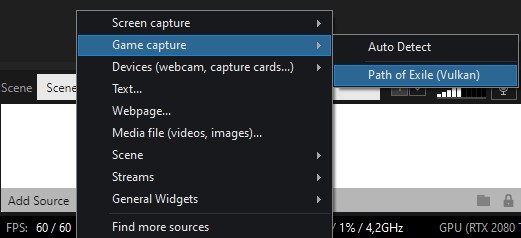
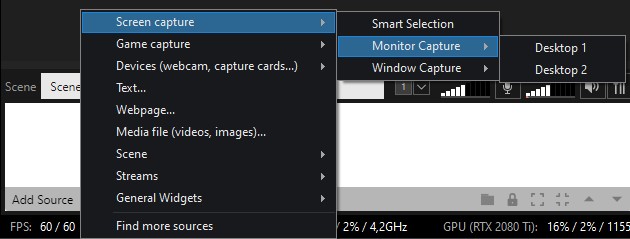
Now, yous have to create a new source to capture your screen. Go to the bottom left, "Add Source" button and choose what you want to share.
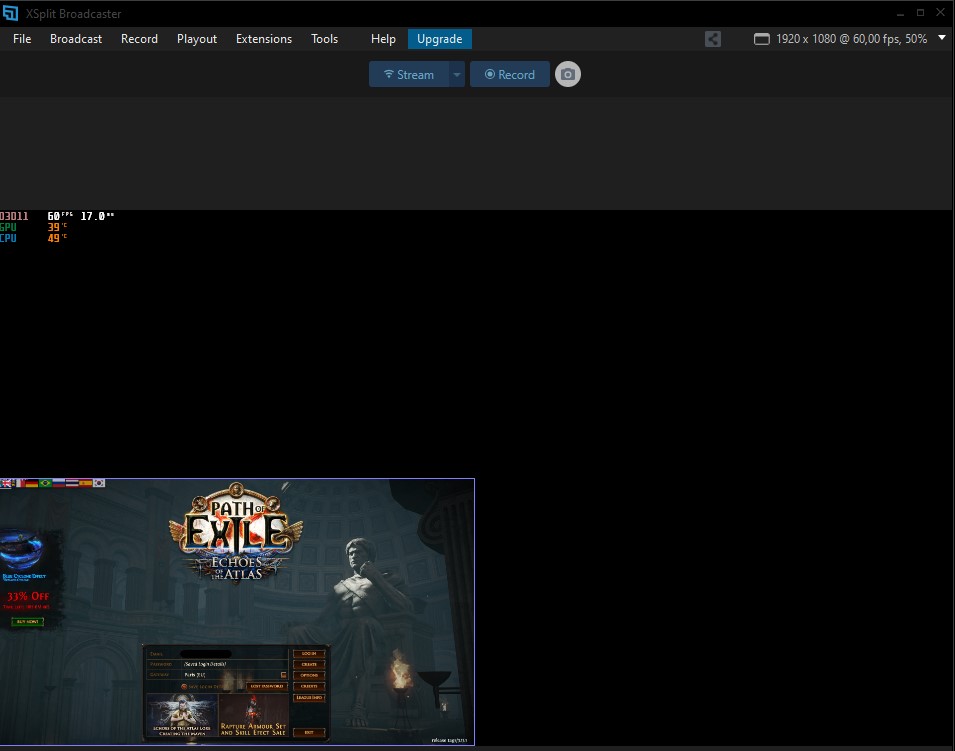
If information technology is a game, start the game, Add Source -> Game Capture. In our case, we have opened the game "Path of Exile" and as you tin see, it already appears in the list. This volition create a window where you can see the game in your XSplit Broadcaster.
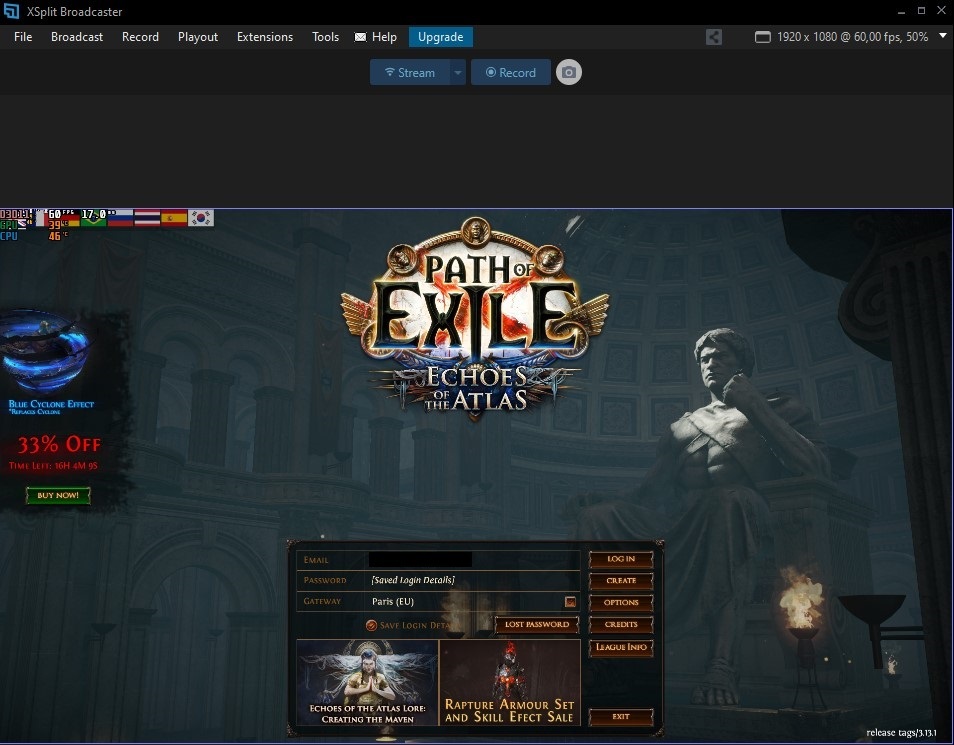
Afterward, the window of your game will appear in modest size and you will exist able, from a corner, to adjust it so that information technology occupies the whole screen.
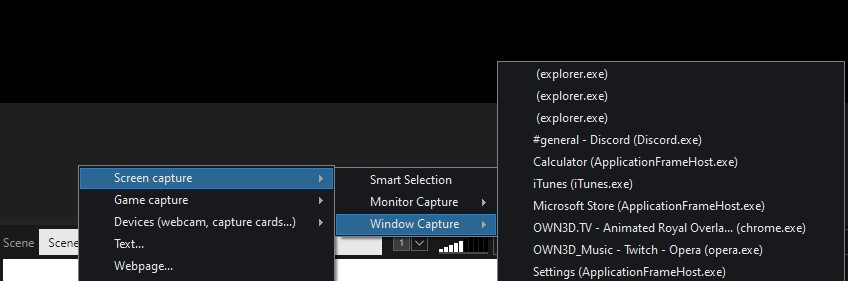
If you want to share your screen, you lot accept to click on Add Source -> Screen Capture - and choose which monitor you want to capture. If you don't want to choose the whole monitor, and you simply desire a specific window, Add Source -> Window Capture - and choose the window y'all want from the list.
For this instance, we are choosing to share our Edge browser window, something very useful if you desire that your viewers watch a YouTube video with you.
As is the case with streaming a game, you can enlarge the window to fill the entire surface and then that your viewers tin can come across everything clearly.
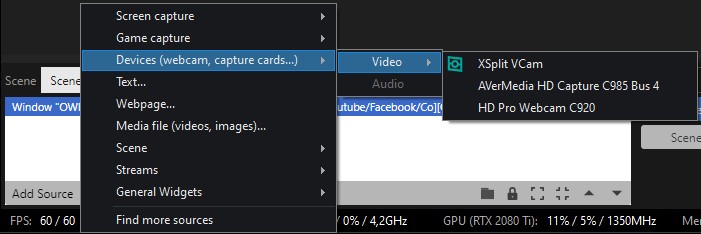
Now that you lot know how to display your game or screen, how near if we accept a webcam and we desire to be displayed? Simply add a new source, Add together Source -> Devices -> Video - and select your webcam. Very easy! In our instance, I have chosen the Logitech HD Pro Webcam C920.
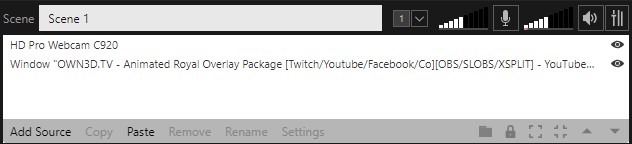
One time selected, you can identify your webcam wherever you want. Only in the list below, it is very important that your webcam is above the screen or the game you are sharing.
4.2 Connect your Twitch account to XSplit Broadcaster and get-go your stream
Once you take on screen what you want to broadcast, it'south time to stream information technology to your Twitch aqueduct. How tin can yous exercise it? It is very unproblematic!
The start thing is to make sure that your sources are prepare and you are ready to offset your alive stream. Once this verification is fabricated, you must press the blue button, called "Stream", which y'all can locate at the top in the middle.

When you click on it for the very first time, a window will announced request you lot in which platform you want to outset the stream. In our case, we select Twitch.
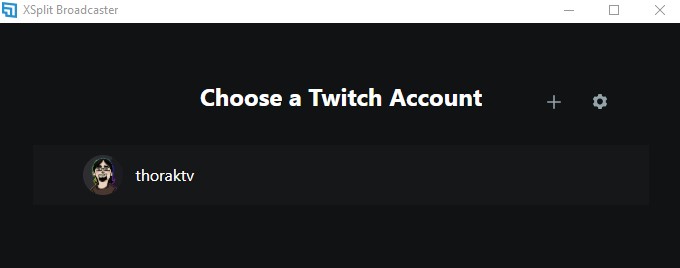
Next, you accept to qualify XSplit Broadcaster to utilize your Twitch account. Click on "Authorize XSplit to use Twitch" and choose your account.
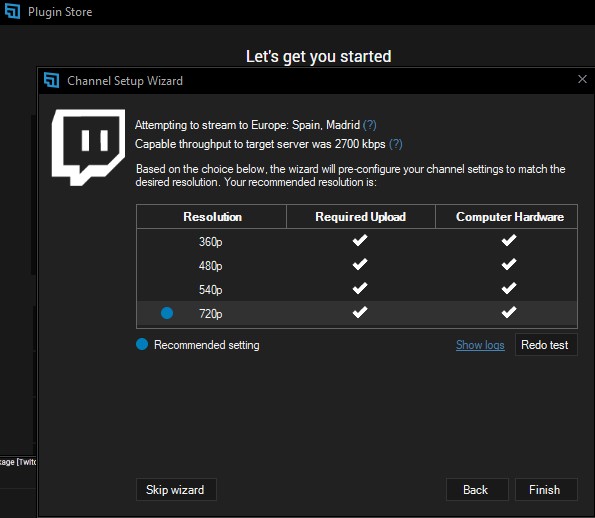
One time picked, but click "Next" so that the arrangement chooses the best Twitch server, in our instance Spain, Madrid, and click "Finish".
Finally, a screen appears for setting the video codec, the bitrate, and the audio encoding. To starting time streaming, click OK and you lot will be asked for your Stream Cardinal.
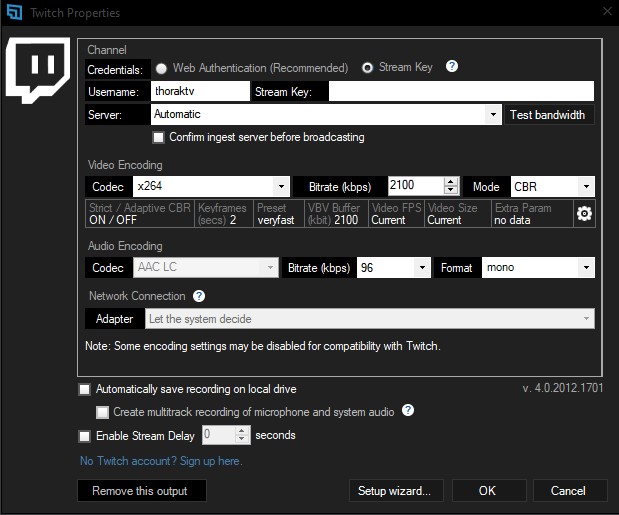
To obtain your Stream Primal, you lot accept to access www.twitch.tv and click on your profile moving picture. Choose "Settings", "Channel and videos" tab, and right at the pinnacle y'all will detect your Stream Primal. You lot must re-create and paste it into XSplit Broadcaster, to the correct of where your username appears.

Once it is ready, you only have to click the blue "Stream" push again and, if everything is OK, it will change its color to red and allow yous know that you are already streaming!

5 Calculation & adjusting overlays, alerts and transitions
At present that you know how to stream, it's time to beginning streaming like a pro. Some basic and common elements used by all professional streamers are overlays, alerts and transitions. Many of them exercise not have fourth dimension or desire to larn how to design these materials or images, and therefore, they rely on services likeOWN3D. In OWN3D nosotros have a wide variety of Overlays, Alerts and Transitions ready to be introduced in your stream.
5.1 Add together and customize your overlay
If you want to add a more professional look to your stream, as we accept already mentioned, the best thing to practise is to add an overlay. In XSplit yous can add either a static overlay or an animated overlay.
The starting time thing to do is to unzip the package, if y'all have purchased i of our overlays, or locate the folder where the image of your overlay is.
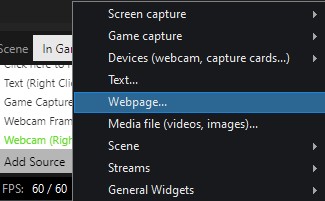
And then, go to XSplit Broadcaster and click onAdd Source -> Media File.
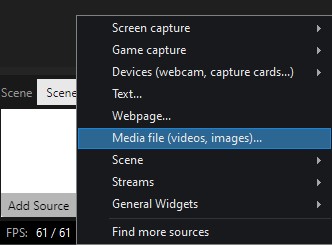
Every bit presently as you click on it, a window pops up and you tin can select the desired image or overlay. If the overlay is static, your file will take a .jpg, .psd or .png extension. If it is an animated overlay from our shop, the format volition be .webm.
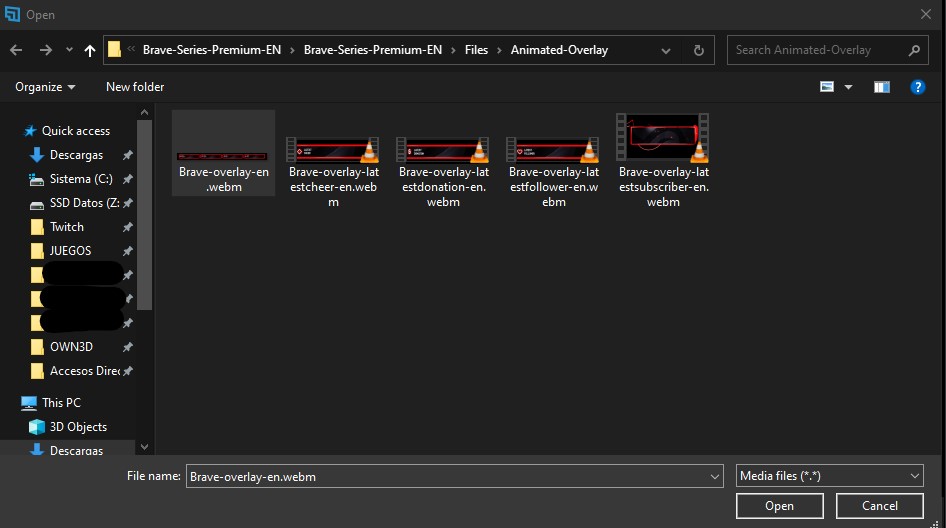
In one case selected, click "Open up" and the overlay will be added to XSplit, where you can suit its size and identify it wherever you want.
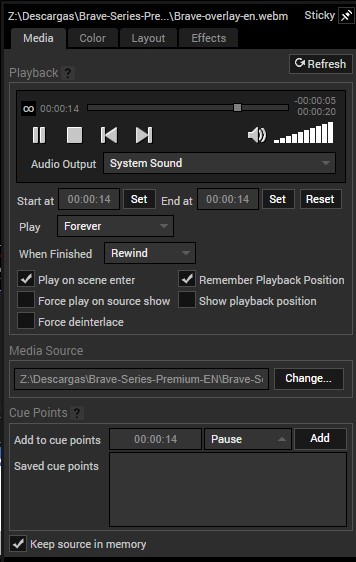
If you accept added an animated overlay, information technology is important to right-click on the overlay, and set a couple of options. The outset one is to cull "Play -> Forever" and the second one, "When Finished -> Rewind". This volition brand the animated effects of your overlay go along playing every few seconds.
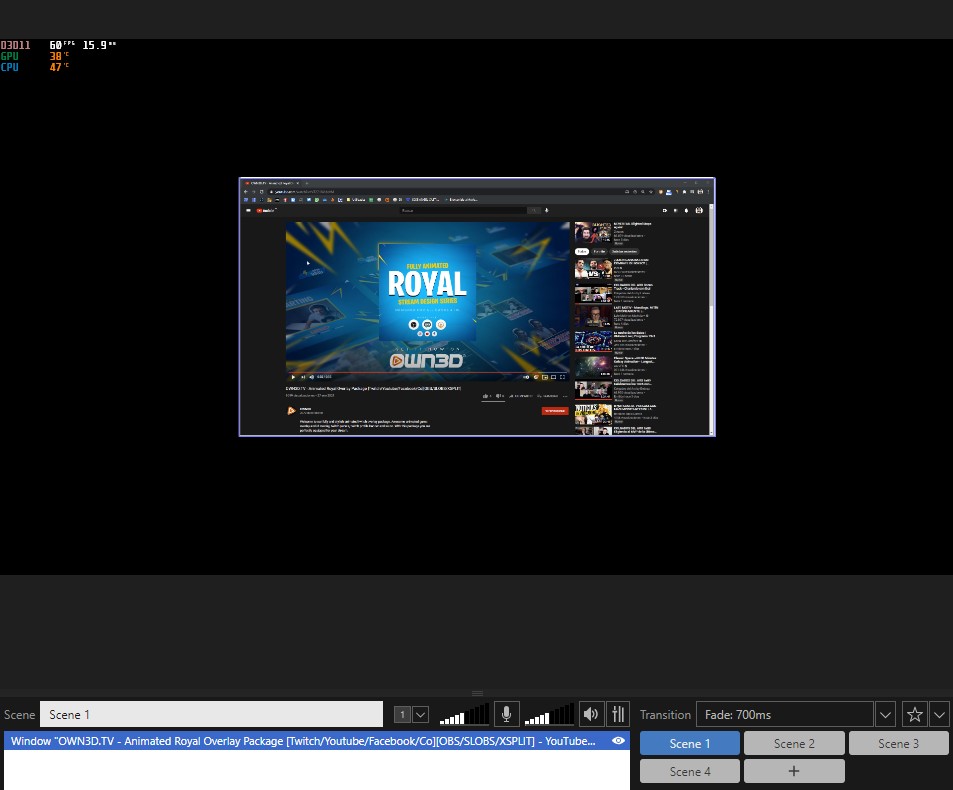
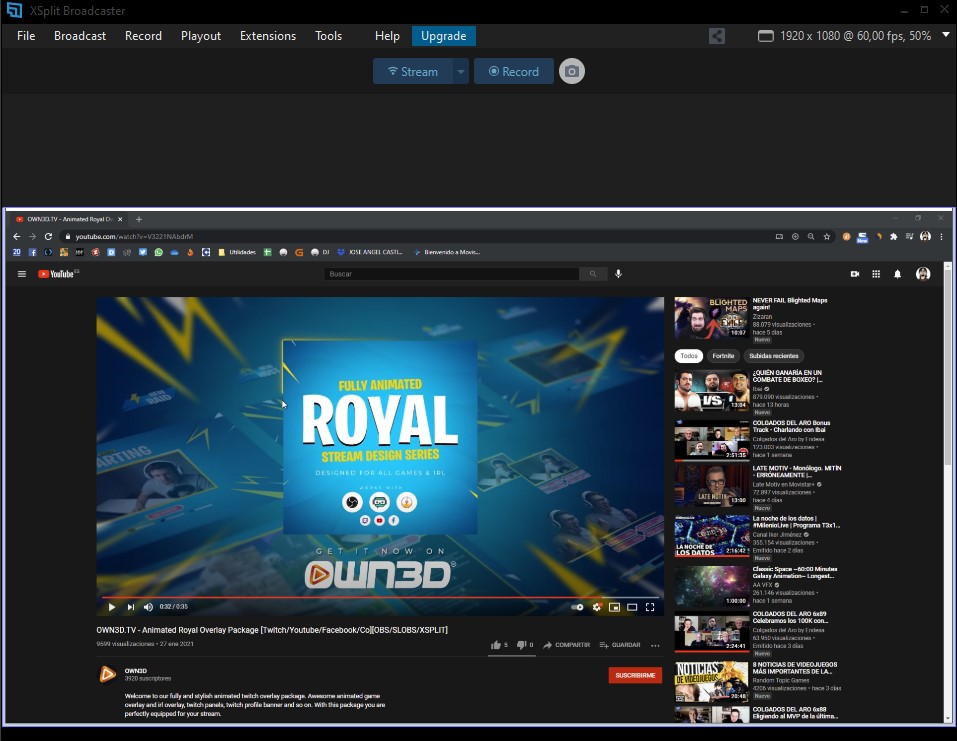
In a like way, you lot tin as well add a webcam overlay. You will simply have to repeat the previous operation, simply selecting the camera overlay. If yous did it right, the result will be something like this:
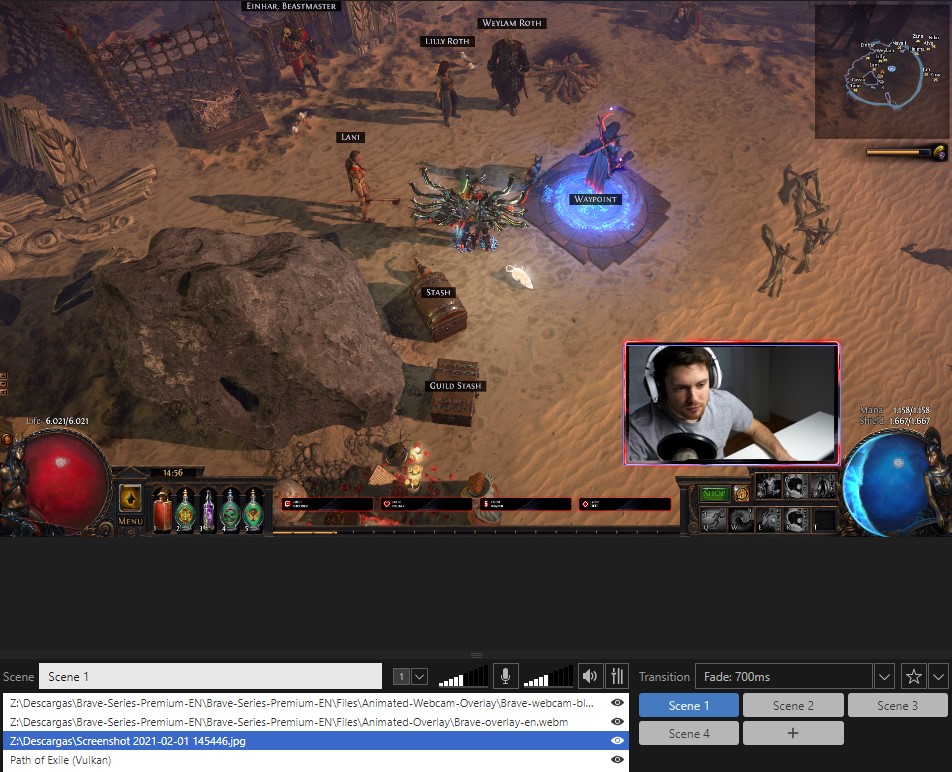
Notation:In XSplit Broadcaster you can have up to iv scenes with the free business relationship. Remember about having one scene for the beginning of the stream, one for Just Chatting, one for Gaming and one for ending, each with a different overlay!
five.ii Adding & customizing stinger transitions
When you have 2 or more than scenes, you desire to spice things up by switching from ane to the other. That'due south why transitions were invented.
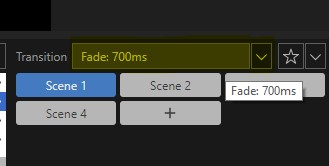
In order to add your stinger transition, you must go to the lesser right, where it says "Transition" and click on the listing of transitions. Here you will detect several predefined transitions. To add our stinger Transition, go to "Stinger Transition -> Add Transition...".
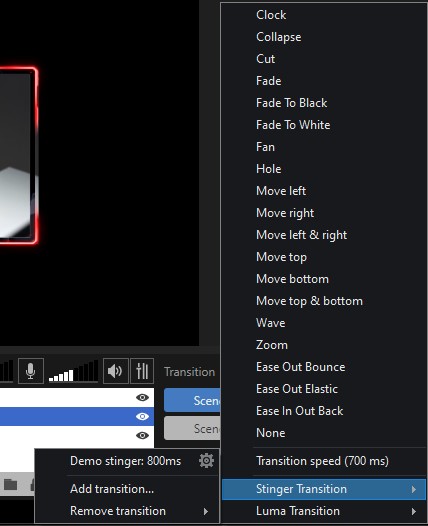
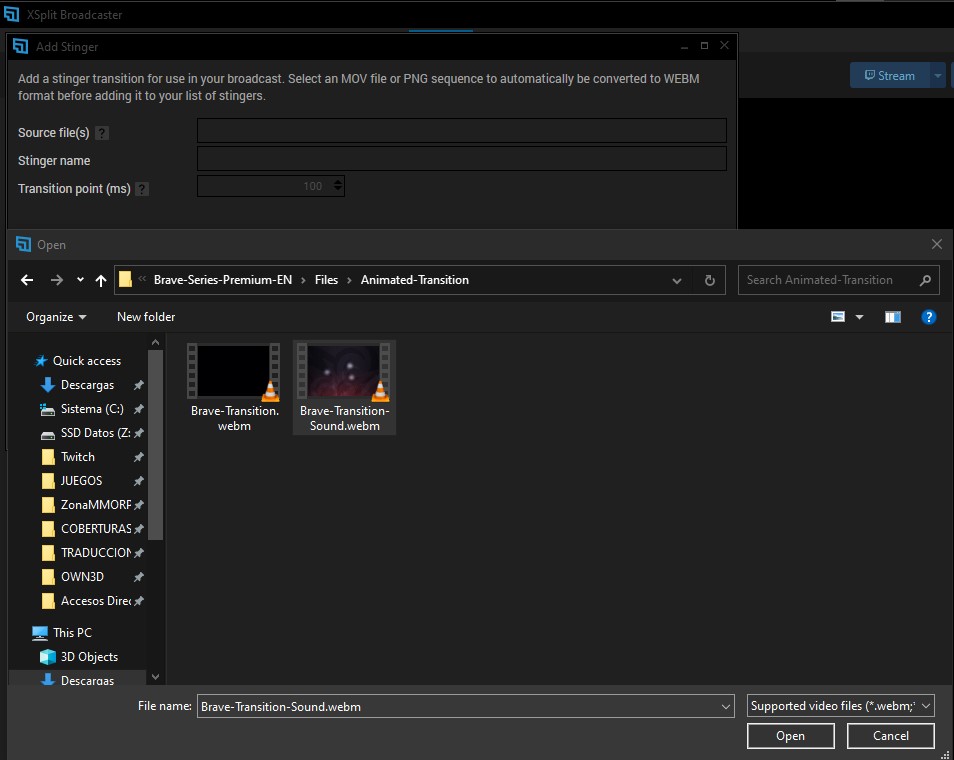
In the following dialog box, click on the iii ellipses "..." and browse for your transition file. It can exist a .png, .webm, .avi or .mov, almost whatsoever type of video file will work.
Then, click on "Accept" and it volition appear in the "Stinger Transitions" list, where y'all can select it and it will appear every time y'all switch to a different scene.
5.3 How to add alerts to XSplit Broadcast
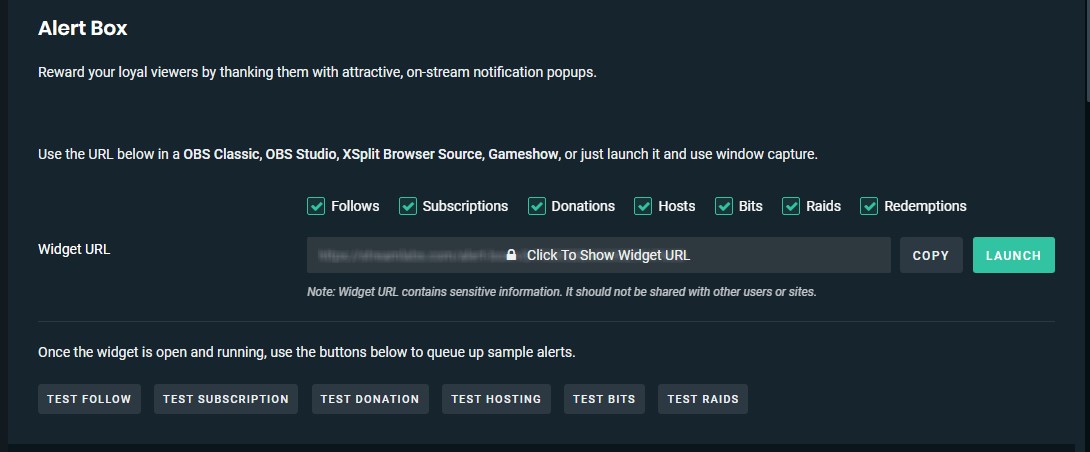
All the large Twitch channels use alerts to show their followers donations, latest subscribers or followers, or to signal incoming raids and hosts. To add alerts to XSplit Broadcast you volition need to apply a third-party site such equally streamlabs.com. Streamlabs is our preferred site for setting upwards alerts and you can access it using your Twitch account.
5.3.1 How to configure Streamlabs alerts
Once inside, and logged in to your Twitch business relationship, yous have to go to the Streamlabs command panel, click on Widgets->Alertbox. There yous will find all the options to configure your alerts.
5.iii.2 Streamlabs - Widget URL
In social club to add together an alert to XSplit, we need the URL of the Streamlabs Widget. In Widgets -> Alertbox you will find the URL that y'all should copy and so paste into XSplit Broadcast. Information technology is important not to share this accost with anyone.
5.3.3 Full general Settings
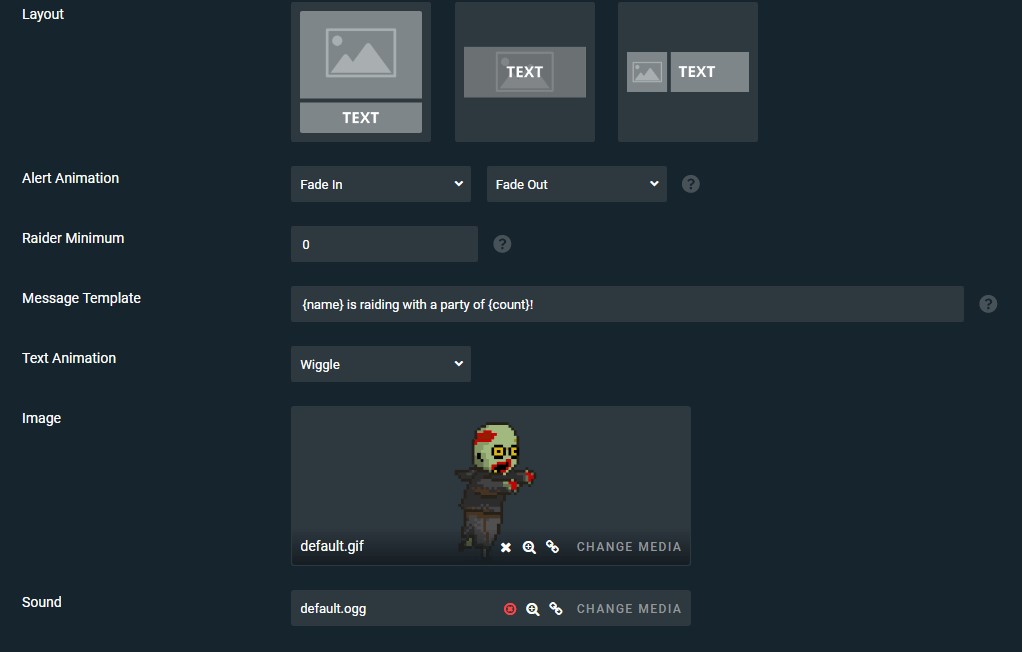
Under the Full general Settings you tin modify some of the default values, such as the paradigm position, the alert text or the font color, and fifty-fifty set delays.
five.three.4 Followers, donations, subscribers
The remaining tabs are reserved for more than detailed options for each of the alerts. You tin can enable or disable each alarm individually, override the default options and add a custom message to each alert. Yous will be able to do it very hands, like this:
• {name}: It will be changing with the name of the donors, followers, etc.…
• {amount}: The amount of coin or bits donated.
Here y'all can likewise add an image, sound or animation to the alert. If you take purchased 1 of our complete overlay packages or ane of our animated alerts fromOWN3D.TV, in each section you will be able to enter the Webm file indicated. You can configure an alert for subscribers, another for donations, raids, host, followers... Our packages include an alert for each situation.
5.three.5 Add together Streamlabs alerts to XSplit Circulate
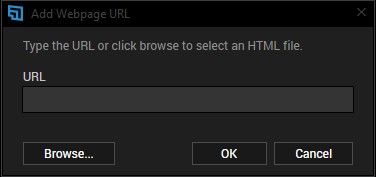
Once all the alerts are configured in Streamlabs, it is very easy to add them into XSplit. To achieve this, copy the URL from Streamlabs widget and paste it in the XSplit source, in Add Source -> Webpage... as shown in the image below:
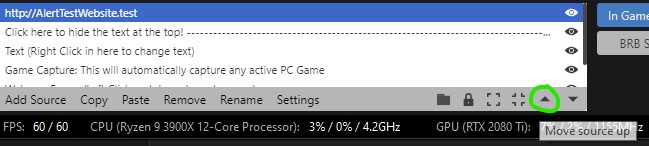
And that's it! Now you just have to place your alerts above all the sources of your scene and place them in the place of the screen that you lot want. To exercise this, you select them in the source list and, using the arrows at the lesser right, or dragging, to put them in the first place.
half dozen Xsplit vs OBS
OBS and XSplit are very like. Both take free and paid accounts, similar performance, since both programs can utilize Nvidia'due south NVENC encoder, dozens of plugins to improve your stream and, in the case of XSplit, a plugin that will allow us to import our scenes already created in OBS.
For a new streamer, XSplit is probably an easier solution to utilize. Its interface, even being very similar to the one you lot constitute in OBS, is more modern and easier to use.
In XSplit, you should highlight how clear its settings are. From them, yous tin perform a lot of deportment, such as configuring hotkeys, adjusting your audio or auto-scheduling messages on social networks every time you kickoff a stream. The latter is a very important part for new streamers and XSplit manages it perfectly. In addition, XSplit has its own software to edit clips.
Of course, in both programs we volition have to configure the alerts using third party sites. Both XSplit and OBS Studio are compatible with Streamlabs and streamelemnts. Nonetheless, adding our new animated alerts will be an easy task.
1 of the battles that XSplit has lost versus OBS Studio, is in the compatibility with operating systems. If you employ MAC Bone or Linux, yous will not be able to apply XSplit Broadcaster and y'all will have to use OBS Studio or some other dissemination software.
In improver, we must betoken out that the free XSplit account does non allow us to preview the changes in real time, create several scenes or add together a small delays to avoid Stream Sniping, something that you can do with OBS Studio.
7 Conclusion
XSplit Broadcast is a very powerful nevertheless robust tool for streaming. It has many different options and is uniform for streaming on Twitch, Facebook or YouTube. In addition, XSplit allows you both, stream and record your games and then edit and upload clips to YouTube or social networks.
Over again, we emphasize its ease of utilise, its multitude of plugins and how fiddling it fails. It is a very robust program that hardly gives errors and allows you lot to perform a lot of options.
Of course, there is still no version for those users who use MAC OS and Linux. And users of the free business relationship may miss some features that Premium account users have, such as creating multiple scenes, adding delay to the live or previewing changes in real fourth dimension. Only if y'all don't need any of the higher up features, XSplit Broadcast is a program to consider.
Source: https://www.own3d.tv/en/blog/tutorials/xsplit-broadcaster-tutorial/
0 Response to "How To Set Up Xsplit Broadcaster"
Post a Comment